m (→List of banners: Make list a little easier to use) |
|||
| Line 16: | Line 16: | ||
|- | |- | ||
| | | | ||
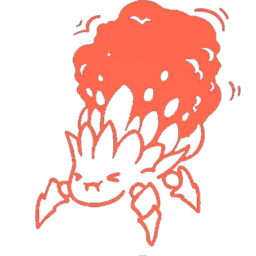
[[File:Vanity_Banner_BlastBeetle01Anim.png|border|256x256px|link=Bursting with excitement!]] | [[File:Vanity_Banner_BlastBeetle01Anim.png|border|256x256px|link=Bursting with excitement! I]] | ||
{{clear}}[[Bursting with excitement!]] | {{clear}}[[Bursting with excitement! I]] | ||
| | | | ||
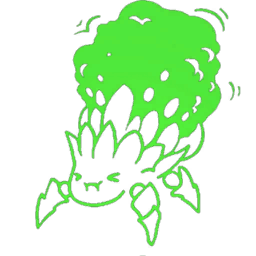
[[File:Vanity_Banner_BlastBeetleAnim.png|border|256x256px|link=Bursting with excitement!]] | [[File:Vanity_Banner_BlastBeetleAnim.png|border|256x256px|link=Bursting with excitement! II]] | ||
{{clear}}[[Bursting with excitement!]] | {{clear}}[[Bursting with excitement! II]] | ||
| | | | ||
[[File:Vanity_Banner_BlastBeetle.png|border|256x256px|link=I'm having a blast!]] | [[File:Vanity_Banner_BlastBeetle.png|border|256x256px|link=I'm having a blast!]] | ||
| Line 35: | Line 35: | ||
{{clear}}[[All-seeing]] | {{clear}}[[All-seeing]] | ||
| | | | ||
[[File:Vanity_Banner_GoodJobAnim.png|border|256x256px|link=Good Job]] | [[File:Vanity_Banner_GoodJobAnim.png|border|256x256px|link=Good Job I]] | ||
{{clear}}[[Good Job]] | {{clear}}[[Good Job I]] | ||
| | | | ||
[[File:Vanity_Banner_GoodJob01Anim.png|border|256x256px|link=Good Job]] | [[File:Vanity_Banner_GoodJob01Anim.png|border|256x256px|link=Good Job II]] | ||
{{clear}}[[Good Job]] | {{clear}}[[Good Job II]] | ||
| | | | ||
[[File:Vanity_Banner_LeafmanAnim.png|border|256x256px|link=The Little Leafman]] | [[File:Vanity_Banner_LeafmanAnim.png|border|256x256px|link=The Little Leafman]] | ||
| Line 67: | Line 67: | ||
{{clear}}[[Stay Away]] | {{clear}}[[Stay Away]] | ||
| | | | ||
[[File:Vanity_Banner_Doves.png|border|256x256px|link=Peace & Love]] | [[File:Vanity_Banner_Doves.png|border|256x256px|link=Peace & Love I (Banner)]] | ||
{{clear}}[[Peace & Love]] | {{clear}}[[Peace & Love I (Banner)]] | ||
| | | | ||
[[File:Vanity_Banner_Friendly.png|border|256x256px|link=Stay Cool]] | [[File:Vanity_Banner_Friendly.png|border|256x256px|link=Stay Cool]] | ||
| Line 108: | Line 108: | ||
{{clear}}[[Sniper Eye]] | {{clear}}[[Sniper Eye]] | ||
| | | | ||
[[File:Vanity_Banner_Warden01.png|border|256x256px|link=Brute]] | [[File:Vanity_Banner_Warden01.png|border|256x256px|link=Brute (Banner)]] | ||
{{clear}}[[Brute]] | {{clear}}[[Brute (Banner)]] | ||
|- | |- | ||
| | | | ||
| Line 115: | Line 115: | ||
{{clear}}[[Brute Killer]] | {{clear}}[[Brute Killer]] | ||
| | | | ||
[[File:Vanity_Banner_Teatime.png|border|256x256px|link=Time for tea]] | [[File:Vanity_Banner_Teatime.png|border|256x256px|link=Time for tea (Banner)]] | ||
{{clear}}[[Time for tea]] | {{clear}}[[Time for tea (Banner)]] | ||
| | | | ||
[[File:Vanity_Banner_Mom.png|border|256x256px|link=Mama's Boy]] | [[File:Vanity_Banner_Mom.png|border|256x256px|link=Mama's Boy]] | ||
| Line 128: | Line 128: | ||
|- | |- | ||
| | | | ||
[[File:Vanity_Banner_ScrewU.png|border|256x256px|link=Screw U!]] | [[File:Vanity_Banner_ScrewU.png|border|256x256px|link=Screw U! (Banner)]] | ||
{{clear}}[[Screw U!]] | {{clear}}[[Screw U! (Banner)]] | ||
| | | | ||
[[File:Vanity_Banner_TipsyDrone.png|border|256x256px|link=Tipsy Drone (Banner)]] | |||
{{clear}}[[Tipsy Drone (Banner)]] | |||
[[File:Vanity_Banner_TipsyDrone.png|border|256x256px|link=Tipsy Drone]] | |||
{{clear}}[[Tipsy Drone | |||
|- | |- | ||
| | | | ||
[[File:Vanity_Banner_CrescentFallsRing.png|border|256x256px|link=Crescent Falls]] | [[File:Vanity_Banner_CrescentFallsRing.png|border|256x256px|link=Crescent Falls]] | ||
{{clear}}[[Crescent Falls]] | {{clear}}[[Crescent Falls]] | ||
| | | | ||
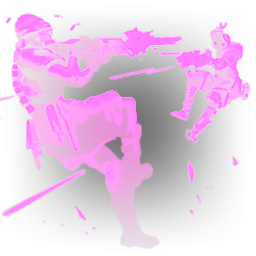
[[File:Vanity_Banner_FightMe.png|border|256x256px|link=Fight Me!]] | [[File:Vanity_Banner_FightMe.png|border|256x256px|link=Fight Me! (Banner)]] | ||
{{clear}}[[Fight Me!]] | {{clear}}[[Fight Me! (Banner)]] | ||
| | | | ||
[[File:Vanity_Banner_IndieReference.png|border|256x256px|link=Egg Swipe]] | [[File:Vanity_Banner_IndieReference.png|border|256x256px|link=Egg Swipe (Banner)]] | ||
{{clear}}[[Egg Swipe]] | {{clear}}[[Egg Swipe (Banner)]] | ||
|- | |- | ||
| | | | ||
[[File:Vanity_Banner_ItsFine.png|border|256x256px|link=This is fine]] | [[File:Vanity_Banner_ItsFine.png|border|256x256px|link=This is fine]] | ||
{{clear}}[[This is fine]] | {{clear}}[[This is fine (Banner)]] | ||
| | | | ||
[[File:Vanity_Banner_KillingZone.png|border|256x256px|link=Killing Zone]] | [[File:Vanity_Banner_KillingZone.png|border|256x256px|link=Killing Zone]] | ||
| Line 176: | Line 161: | ||
|- | |- | ||
| | | | ||
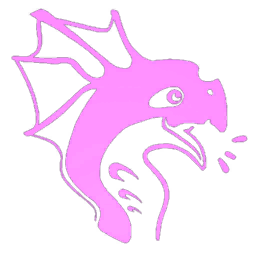
[[File:Vanity_Banner_SaltyWinerAnim.png|border|256x256px|link=Salty?]] | [[File:Vanity_Banner_SaltyWinerAnim.png|border|256x256px|link=Salty? (Banner)]] | ||
{{clear}}[[Salty?]] | {{clear}}[[Salty? (Banner)]] | ||
| | | | ||
[[File:Vanity_Banner_SurgeElectrocutedAnim.png|border|256x256px|link=Spiked!]] | [[File:Vanity_Banner_SurgeElectrocutedAnim.png|border|256x256px|link=Spiked! (Banner)]] | ||
{{clear}}[[Spiked!]] | {{clear}}[[Spiked! (Banner)]] | ||
| | | | ||
[[File:Vanity_Banner_PeaceRainbow_M.png|border|256x256px|link=Peace & Love]] | [[File:Vanity_Banner_PeaceRainbow_M.png|border|256x256px|link=Peace & Love]] | ||
{{clear}}[[Peace & Love]] | {{clear}}[[Peace & Love II (Banner)]] | ||
| | | | ||
[[File:Vanity_Banner_Paladin_M.png|border|256x256px|link=Paladin]] | [[File:Vanity_Banner_Paladin_M.png|border|256x256px|link=Paladin]] | ||
| Line 208: | Line 193: | ||
|- | |- | ||
| | | | ||
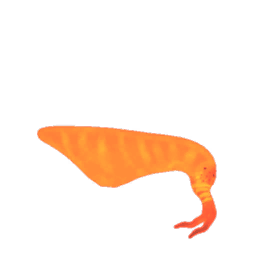
[[File:Vanity_Banner_ConfusedSpitter.png|border|256x256px|link=Confused Spitter]] | [[File:Vanity_Banner_ConfusedSpitter.png|border|256x256px|link=Confused Spitter (Banner)]] | ||
{{clear}}[[Confused Spitter]] | {{clear}}[[Confused Spitter (Banner)]] | ||
| | | | ||
[[File:Vanity_Banner_DoItTriage.png|border|256x256px|link=Do it]] | [[File:Vanity_Banner_DoItTriage.png|border|256x256px|link=Do it]] | ||
| Line 220: | Line 205: | ||
{{clear}}[[Lil' Cutie!]] | {{clear}}[[Lil' Cutie!]] | ||
| | | | ||
[[File:Vanity_Banner_IWantYOU.png|border|256x256px|link=GET OFF THIS ROCK]] | [[File:Vanity_Banner_IWantYOU.png|border|256x256px|link=GET OFF THIS ROCK (Banner)]] | ||
{{clear}}[[GET OFF THIS ROCK]] | {{clear}}[[GET OFF THIS ROCK (Banner)]] | ||
|- | |- | ||
| | | | ||
| Line 235: | Line 220: | ||
[[File:Vanity_Banner_WhiteFlag.png|border|256x256px|link=Ceasefire!]] | [[File:Vanity_Banner_WhiteFlag.png|border|256x256px|link=Ceasefire!]] | ||
{{clear}}[[Ceasefire!]] | {{clear}}[[Ceasefire!]] | ||
|- | |- | ||
| | | | ||
| Line 291: | Line 273: | ||
{{clear}}[[The Fortuna Express]] | {{clear}}[[The Fortuna Express]] | ||
| | | | ||
[[File:Vanity_Banner_MarshalSpecOps.png|border|256x256px|link=Special Operations Unit]] | [[File:Vanity_Banner_MarshalSpecOps.png|border|256x256px|link=Special Operations Unit (Banner)]] | ||
{{clear}}[[Special Operations Unit]] | {{clear}}[[Special Operations Unit (Banner)]] | ||
| | | | ||
[[File:Vanity_Banner_MarshalFirstToFight.png|border|256x256px|link=Marshal's Badge]] | [[File:Vanity_Banner_MarshalFirstToFight.png|border|256x256px|link=Marshal's Badge (Banner)]] | ||
{{clear}}[[Marshal's Badge]] | {{clear}}[[Marshal's Badge (Banner)]] | ||
| | | | ||
[[File:Vanity_Banner_VeteranPack_OldTimer.png|border|256x256px|link=Old Timer]] | [[File:Vanity_Banner_VeteranPack_OldTimer.png|border|256x256px|link=Old Timer]] | ||
{{clear}}[[Old Timer]] | {{clear}}[[Old Timer]] | ||
| | | | ||
[[File:Vanity_Banner_Pandemonium.png|border|256x256px|link=Showdown]] | [[File:Vanity_Banner_Pandemonium.png|border|256x256px|link=Showdown (Banner)]] | ||
{{clear}}[[Showdown]] | {{clear}}[[Showdown (Banner)]] | ||
|- | |- | ||
| | | | ||
[[File:Vanity_Banner_Overdrive.png|border|256x256px|link=Overdrive]] | [[File:Vanity_Banner_Overdrive.png|border|256x256px|link=Overdrive (Banner)]] | ||
{{clear}}[[Overdrive]] | {{clear}}[[Overdrive (Banner)]] | ||
| | | | ||
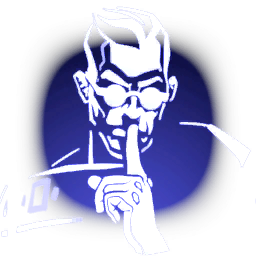
[[File:Vanity_Banner_GoingDark.png|border|256x256px|link=Shhh, we're hunting fools]] | [[File:Vanity_Banner_GoingDark.png|border|256x256px|link=Shhh, we're hunting fools]] | ||
{{clear}}[[Shhh, we're hunting fools]] | {{clear}}[[Shhh, we're hunting fools]] | ||
| | | | ||
[[File:Vanity_Banner_OsirisOwl.png|border|256x256px|link=Harbinger Corps]] | [[File:Vanity_Banner_OsirisOwl.png|border|256x256px|link=Harbinger Corps]] | ||
{{clear}}[[Harbinger Corps]] | {{clear}}[[Harbinger Corps]] | ||
|- | |- | ||
| | | | ||
[[File:Vanity_Banner_IngotWeTrust.png|border|256x256px|link=Ingot We Trust]] | [[File:Vanity_Banner_IngotWeTrust.png|border|256x256px|link=Ingot We Trust]] | ||
{{clear}}[[Ingot We Trust]] | {{clear}}[[Ingot We Trust]] | ||
| | | | ||
[[File:Vanity_Banner_VetExplorerClimbing.png|border|256x256px|link=The Conquest of Knowledge]] | [[File:Vanity_Banner_VetExplorerClimbing.png|border|256x256px|link=The Conquest of Knowledge I]] | ||
{{clear}}[[The Conquest of Knowledge]] | {{clear}}[[The Conquest of Knowledge I]] | ||
| | | | ||
[[File:Vanity_Banner_VetExplorerFlag.png|border|256x256px|link=The Conquest of Knowledge]] | [[File:Vanity_Banner_VetExplorerFlag.png|border|256x256px|link=The Conquest of Knowledge II]] | ||
{{clear}}[[The Conquest of Knowledge]] | {{clear}}[[The Conquest of Knowledge II]] | ||
| | | | ||
[[File:Vanity_Banner_TheySeeEverything.png|border|256x256px|link=The All-Seeing]] | [[File:Vanity_Banner_TheySeeEverything.png|border|256x256px|link=The All-Seeing (Banner)]] | ||
{{clear}}[[The All-Seeing]] | {{clear}}[[The All-Seeing (Banner)]] | ||
|- | |- | ||
| | | | ||
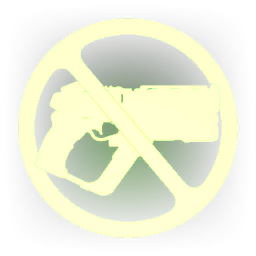
| Line 342: | Line 315: | ||
{{clear}}[[NO TRESSPASSING]] | {{clear}}[[NO TRESSPASSING]] | ||
| | | | ||
[[File:Vanity_Banner_MarshalHandcuffs02.png|border|256x256px|link=Marshal Cuffs]] | [[File:Vanity_Banner_MarshalHandcuffs02.png|border|256x256px|link=Marshal Cuffs (Banner)]] | ||
{{clear}}[[Marshal Cuffs]] | {{clear}}[[Marshal Cuffs (Banner)]] | ||
| | | | ||
[[File:Vanity_Banner_BountyHunterChomp.png|border|256x256px|link=Chomp!]] | [[File:Vanity_Banner_BountyHunterChomp.png|border|256x256px|link=Chomp! (Banner)]] | ||
{{clear}}[[Chomp!]] | {{clear}}[[Chomp! (Banner)]] | ||
| | | | ||
[[File:Vanity_Banner_VetExplorerArm.png|border|256x256px|link=Mechanical Arm]] | [[File:Vanity_Banner_VetExplorerArm.png|border|256x256px|link=Mechanical Arm]] | ||
Revision as of 15:19, 15 January 2023

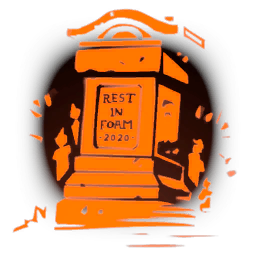
A Banner is a type of Cosmetic in The Cycle: Frontier. They can be placed down on the ground through the cosmetic menu wheel.
Mechanics
- Once a banner is placed down, placing another one will remove the first one.
- The banner displays the name of the player that placed it down, as long as the player is still in the Match.
- Some banners play a sound upon placement, such as the Brute Roar banner.
List of banners
This is an incomplete list of all banners in The Cycle: Frontier.
|
This list makes no guarantee of availability or completeness. Some banners might no longer be in the shop rotation, be from the Fortuna Pass of a past season, be from a special promotion, or be otherwise exclusive. |